LDAP is a paid feature.
If you’re using Infisical Cloud, then it is available under the Enterprise Tier. If you’re self-hosting Infisical,
then you should contact sales@infisical.com to purchase an enterprise license to use it.
1
Prepare LDAP in JumpCloud
In JumpCloud, head to USER MANAGEMENT > Users and create a new user via the Manual user entry option. This user
will be used as a privileged service account to facilitate Infisical’s ability to bind/search the LDAP directory.When creating the user, input their First Name, Last Name, Username (required), Company Email (required), and Description.
Also, create a password for the user.Next, under User Security Settings and Permissions > Permission Settings, check the box next to Enable as LDAP Bind DN.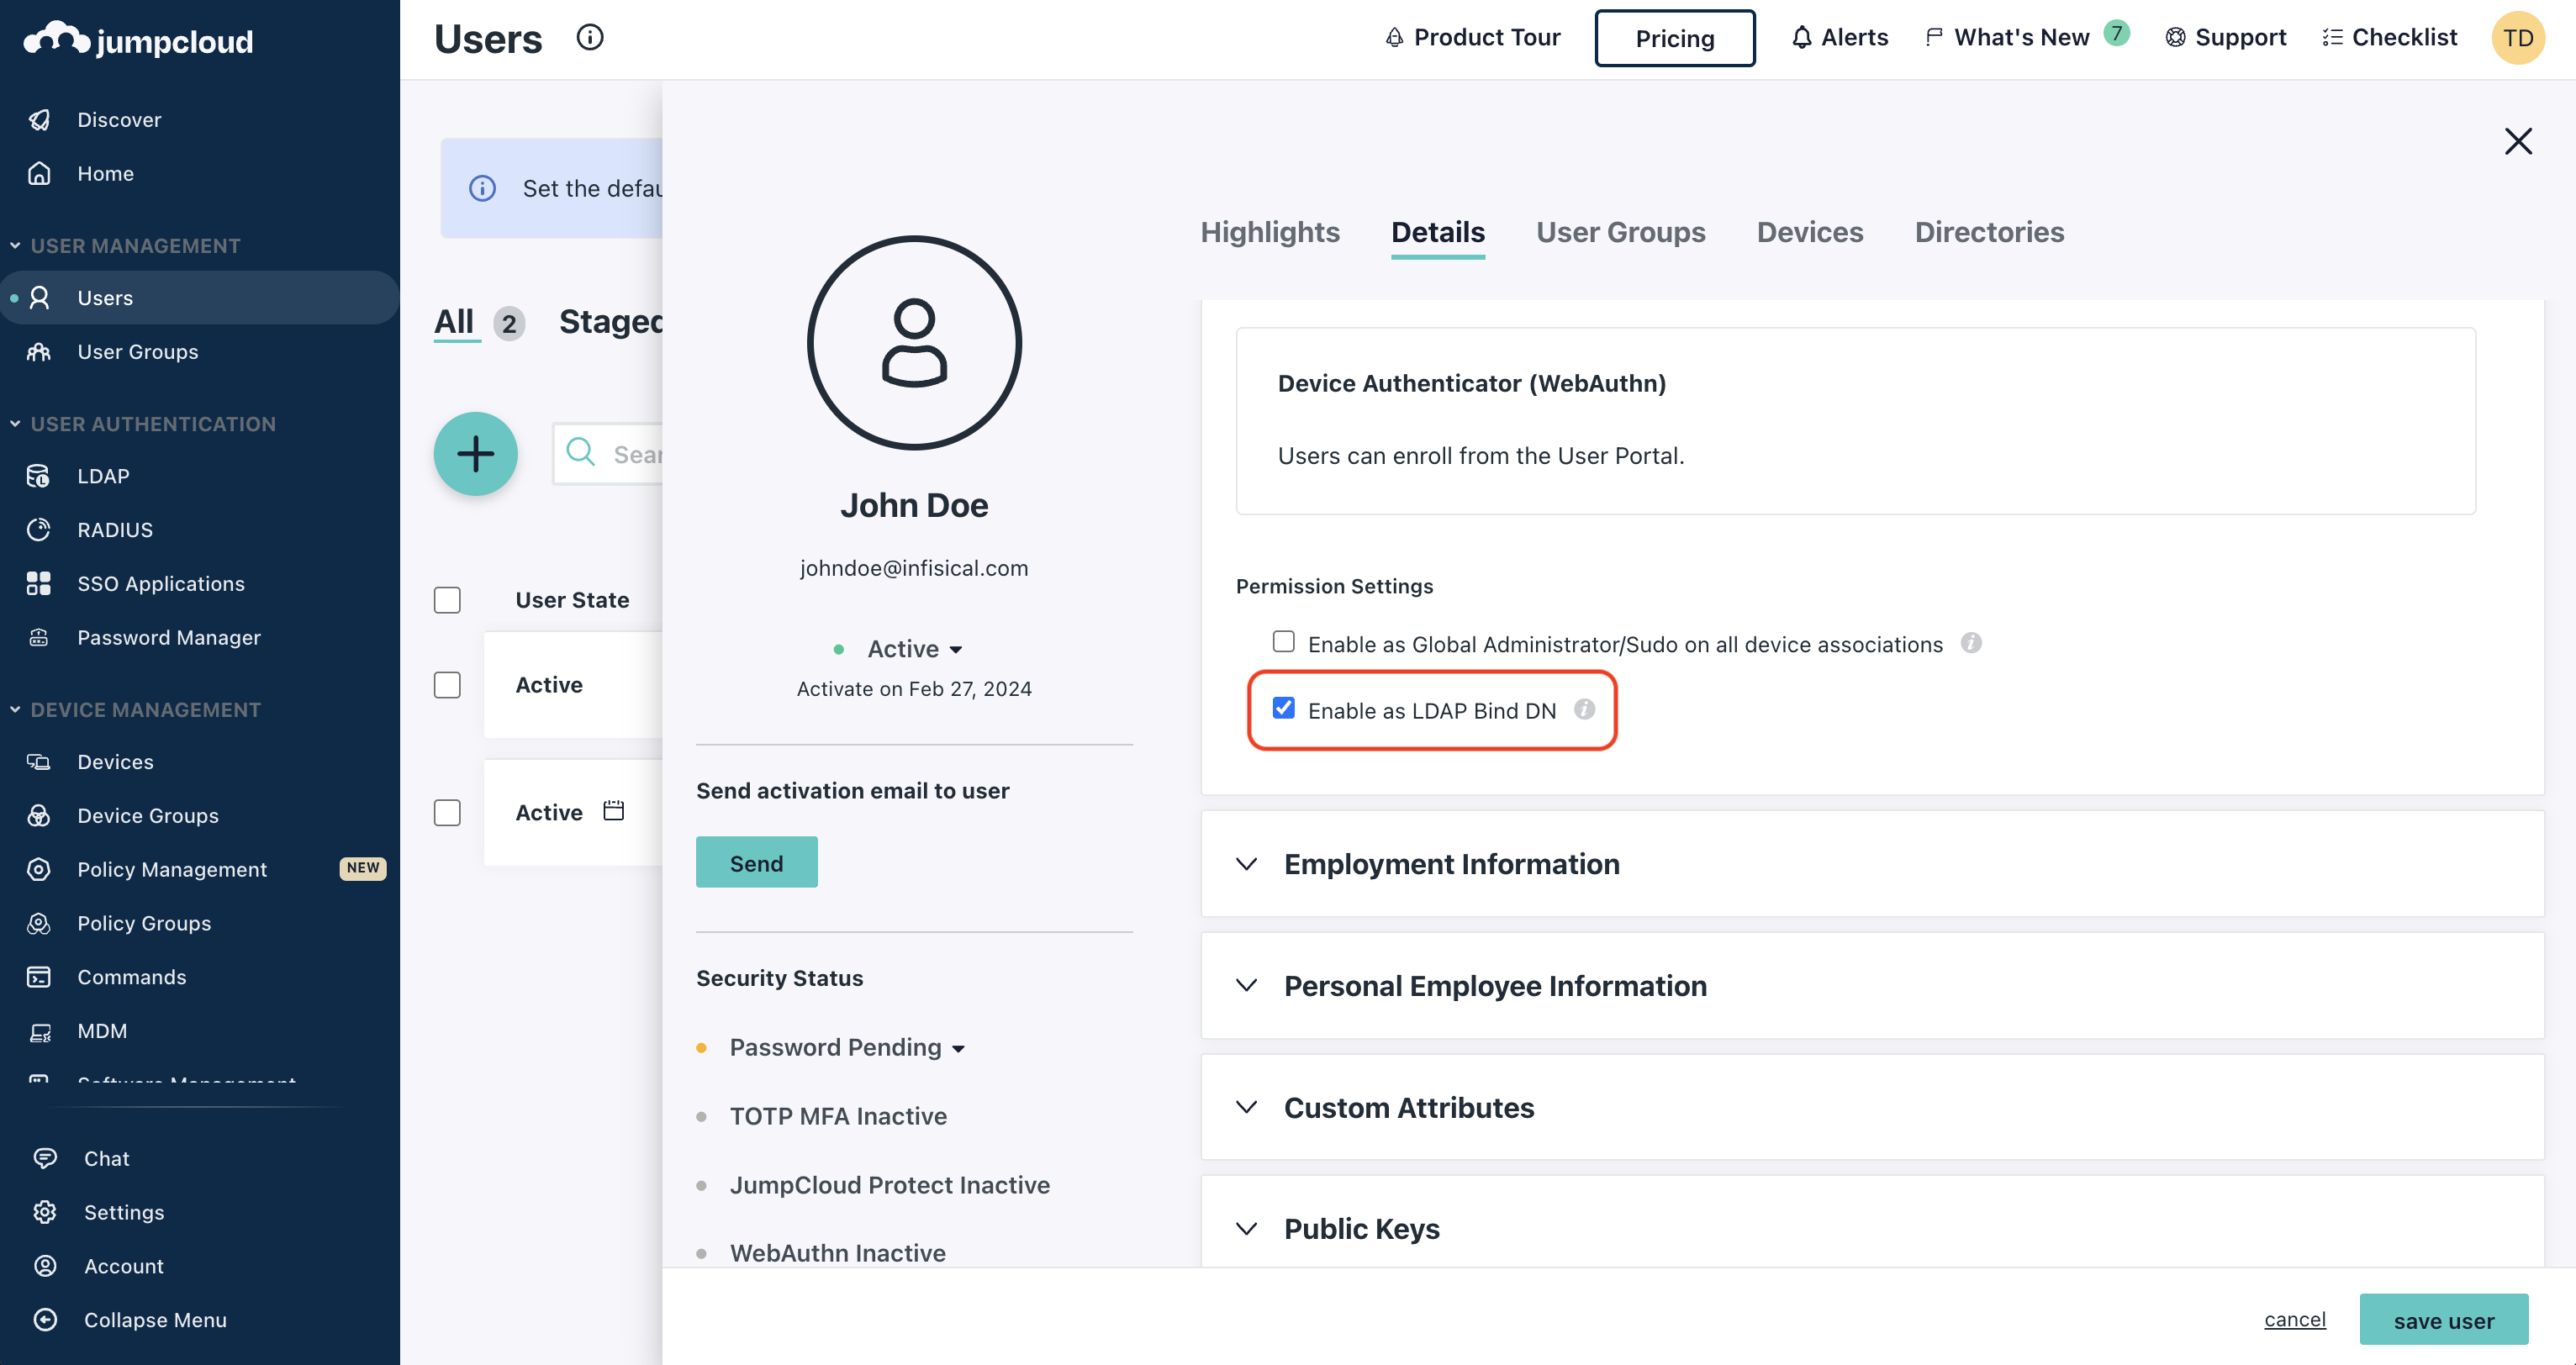
2
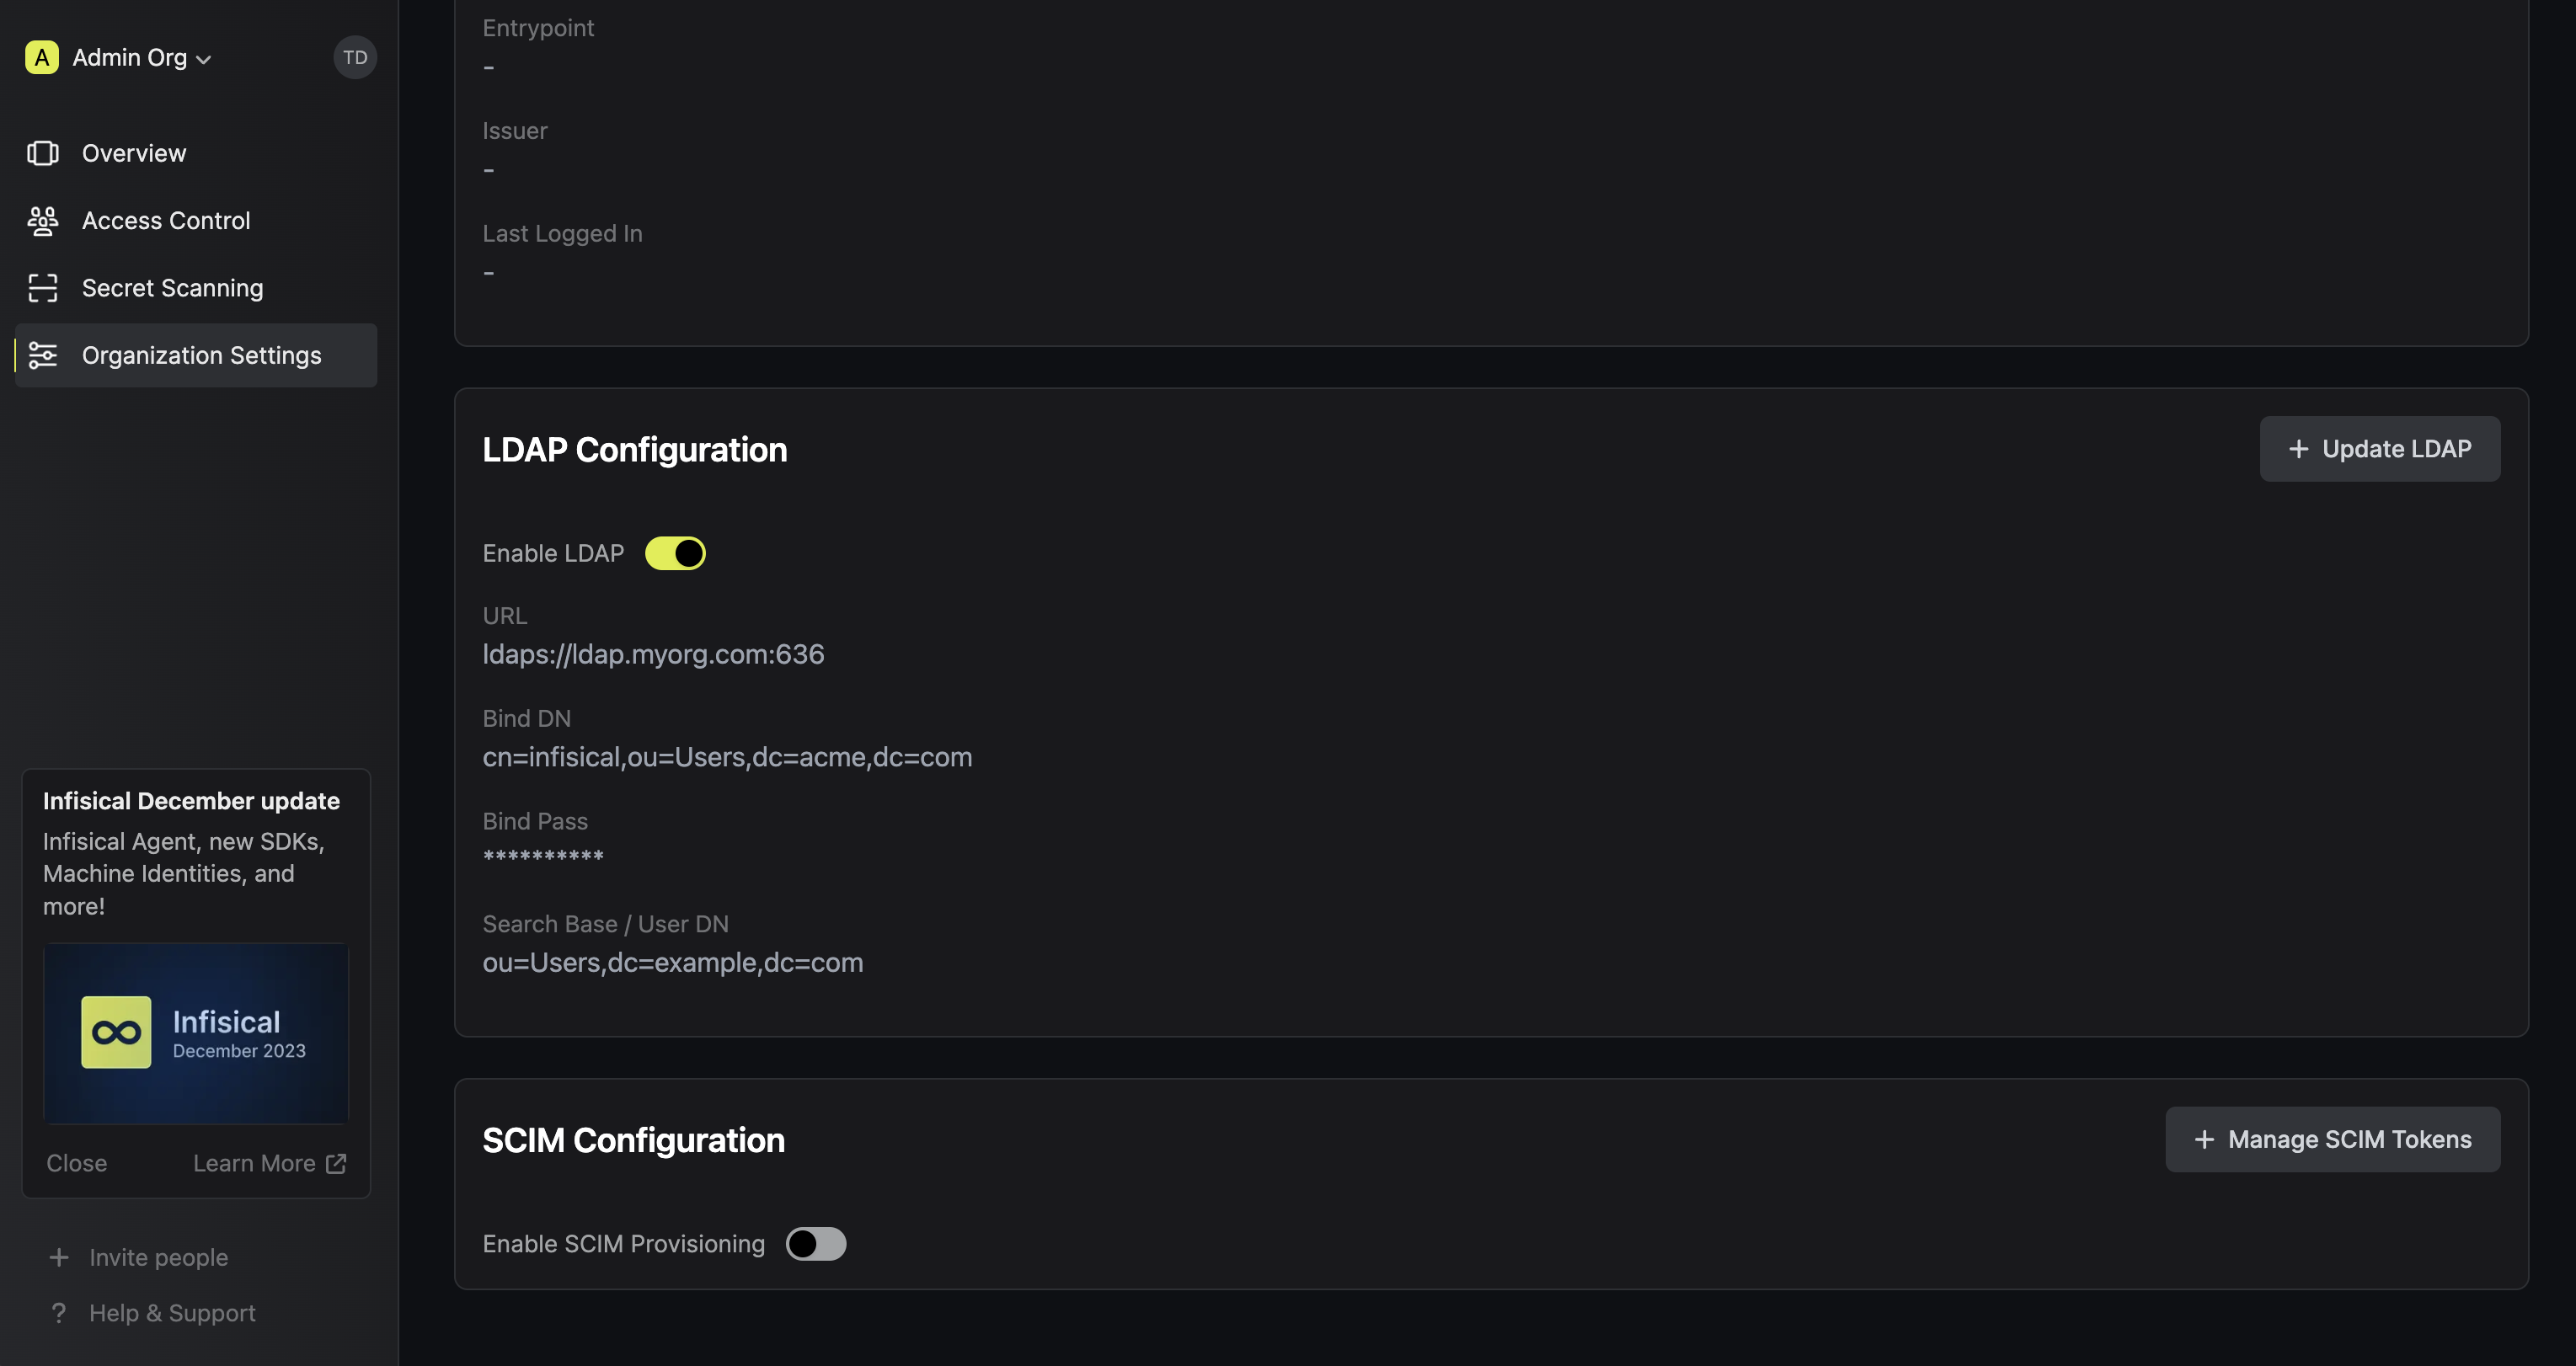
Prepare the LDAP configuration in Infisical
In Infisical, head to your Organization Settings > Authentication > LDAP Configuration and select Set up LDAP.Next, input your JumpCloud LDAP server settings.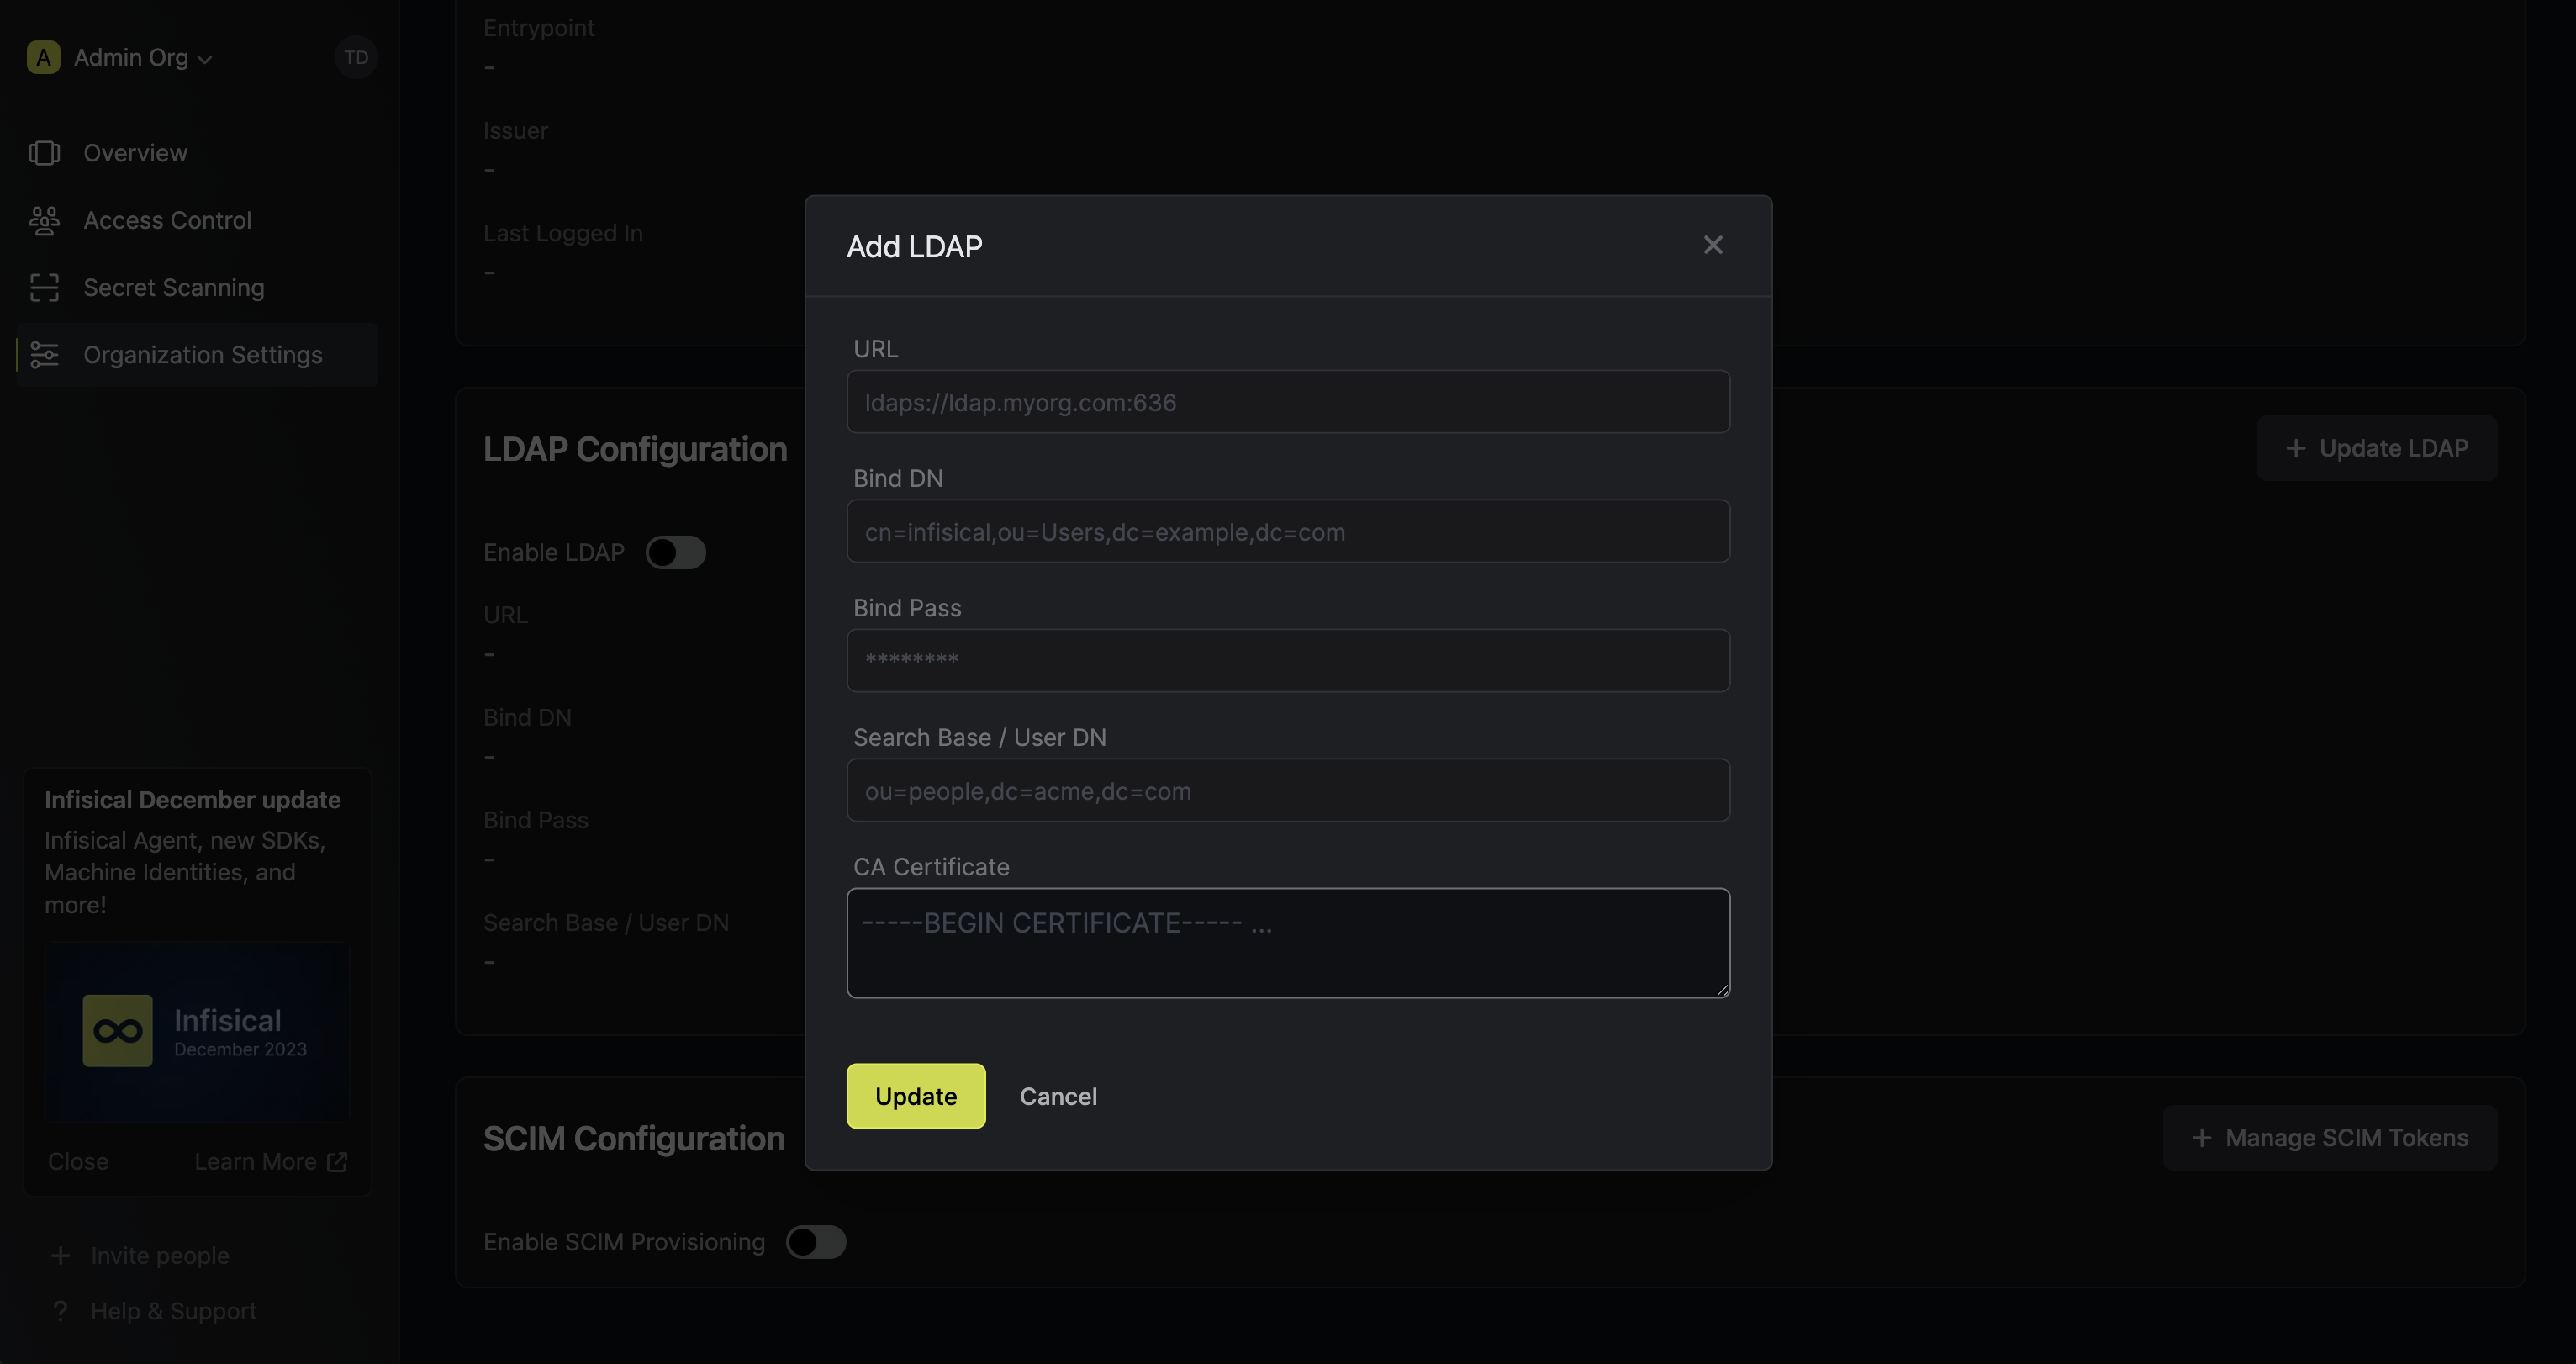 Here’s some guidance for each field:
Here’s some guidance for each field:- URL: The LDAP server to connect to (
ldaps://ldap.jumpcloud.com:636). - Bind DN: The distinguished name of object to bind when performing the user search (
uid=<ldap-user-username>,ou=Users,o=<your-org-id>,dc=jumpcloud,dc=com). - Bind Pass: The password to use along with
Bind DNwhen performing the user search. - Search Base / User DN: Base DN under which to perform user search (
ou=Users,o=<your-org-id>,dc=jumpcloud,dc=com). - CA Certificate: The CA certificate to use when verifying the LDAP server certificate (instructions to obtain the certificate for JumpCloud here).
3
Enable LDAP in Infisical
Enabling LDAP allows members in your organization to log into Infisical via LDAP.